Home Assistant
The WindNerd One anemometer can be integrated with Home Assistant to display wind data on your dashboard and trigger automations, such as sending alerts or closing shutters when wind speed exceeds a set threshold.

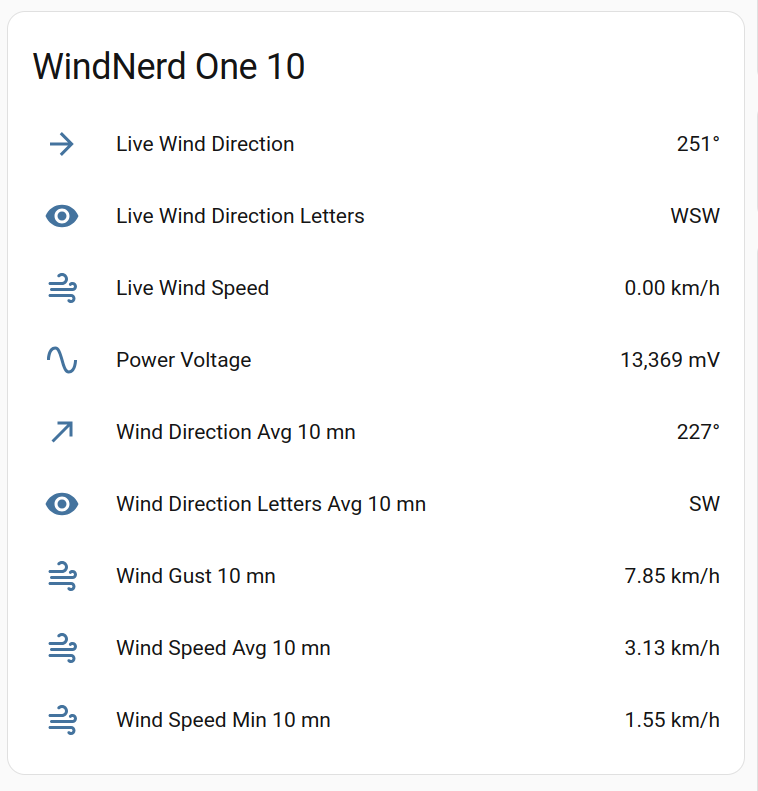
The figure above shows the entities that Home Assistant automatically creates through MQTT discovery. You can customize them within Home Assistant — for example, by changing their names, icons, or hiding those you don't want. This also includes editing the names of the underlying sensor entities, so you can make them more descriptive or easier to recognize in your system.
How to add you Windnerd One as an MQTT device
Install the MQTT add-on
To install the add-on, follow these steps:
-
In Home Assistant, go to Settings → Add-ons → Add-on Store.
-
Locate the Mosquitto broker add-on and select it.
-
Click Install to begin the installation.
-
Start the add-on.
Create a dedicated user
-
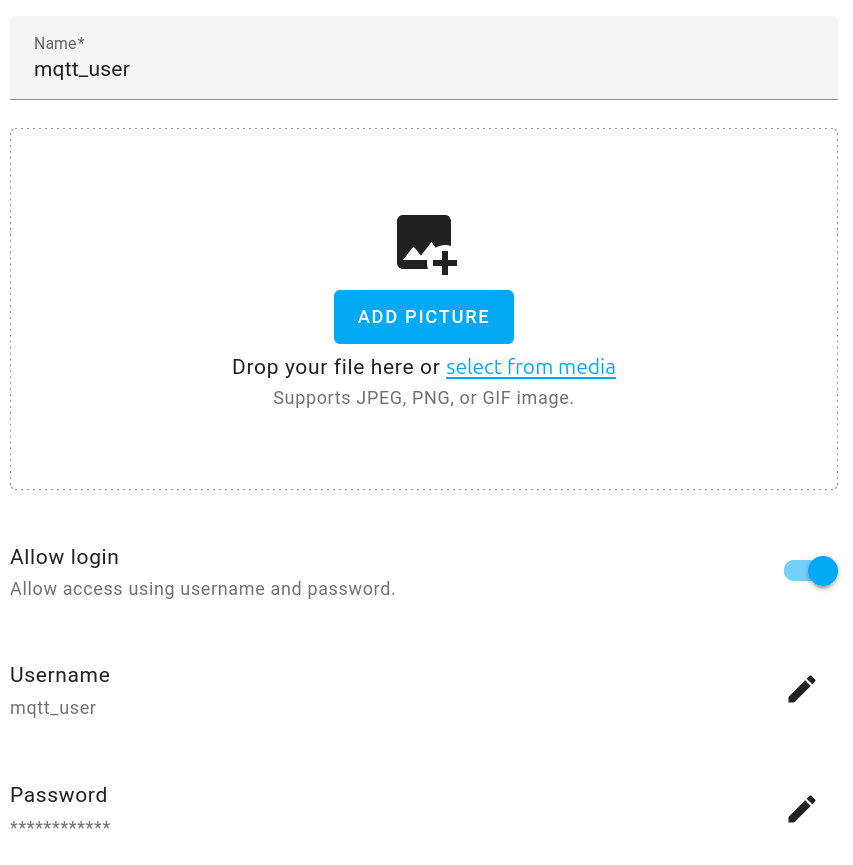
Create a new user dedicated for MQTT by going to Settings → People → Users in the Home Assistant frontend. Choose a username at your convenience. (Do not create the user in the Mosquitto add-on’s Configuration tab.)
-
Allow login and set a password.
-
Click Update to apply the changes.

Configure the WindNerd One
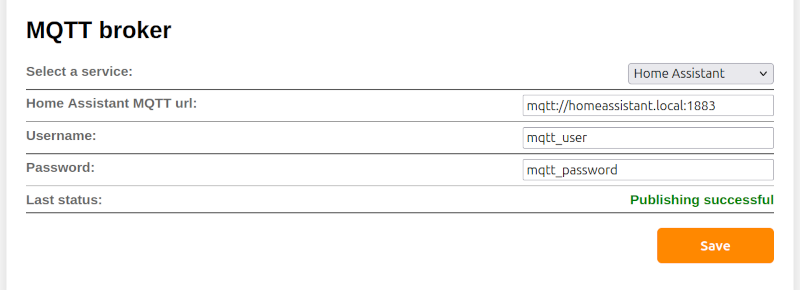
- In the local configuration webpage, go to Remote Services → MQTT broker.
- Select Home Assistant as service
- Check the prefilled MQTT address matches your Home Assistant local address
- Enter the username and password you created in the previous step.
- Save.

After a few seconds, the Last Status field will update. If connected succesfully to Home Assistant, it should show Publishing Successful, then a device card should appear on your dashboard.
Troubleshooting
-
Connection failed
The WindNerd One could not reach the MQTT broker. This may happen if the broker is not accessible on the network, the hostname/IP is incorrect, or the MQTT broker add-on is not running. -
Authentication failed
The WindNerd One successfully connected to the broker, but authentication was rejected. Verify that the MQTT username and password are correct, and that the user has the right permissions. -
Publishing successful, but nothing appears in Home Assistant
If messages are being published but entities do not show up, check Settings → System → Logs in Home Assistant. A failed MQTT discovery attempt should generate an error message there.