WindNerd HQ Initial Setup
Powering
Depending on your kit, it comes with one of the two options below. Both plug into the XH2.54 connector on the board.
USB Power cable
The 4-meter USB-A to XH2.54 cable powers the HQ from any USB charger, such as a phone charger.
- Plug the XH2.54 end into the board and the USB-A end into a USB charger.
- Keep the charger indoors or in a weatherproof box: only the cable should be exposed to the weather.
On the cable, the HQ stays connected to Wi-Fi all the time and does not switch to Eco mode.
Contacts can be separated from the XH2.54 housing by pressing their spring tab with a needle while pulling the wire, so only the two wires have to pass through. Bend the spring tabs back out with a thin tool before reinserting each contact into its original slot.
Sunbank 2W
The Sunbank 2W is a solar base with a rechargeable battery. The HQ sits on top of it and runs on solar power only, with no cable to the mast.
- Follow the Sunbank assembly guide to build it and connect it to the board.
- The HQ manages its own energy: it estimates how much solar energy is available and stays connected to Wi-Fi when it can afford it. When the sun is not enough, it switches to Eco mode, where Wi-Fi reconnects every 1, 2 or 5 minutes to publish the wind.
In Eco mode, the local dashboard and the local HTTP API are not accessible. A short press on the button brings Wi-Fi back for 3 minutes.
Sensor and Magnet Check
-
Power the board.
-
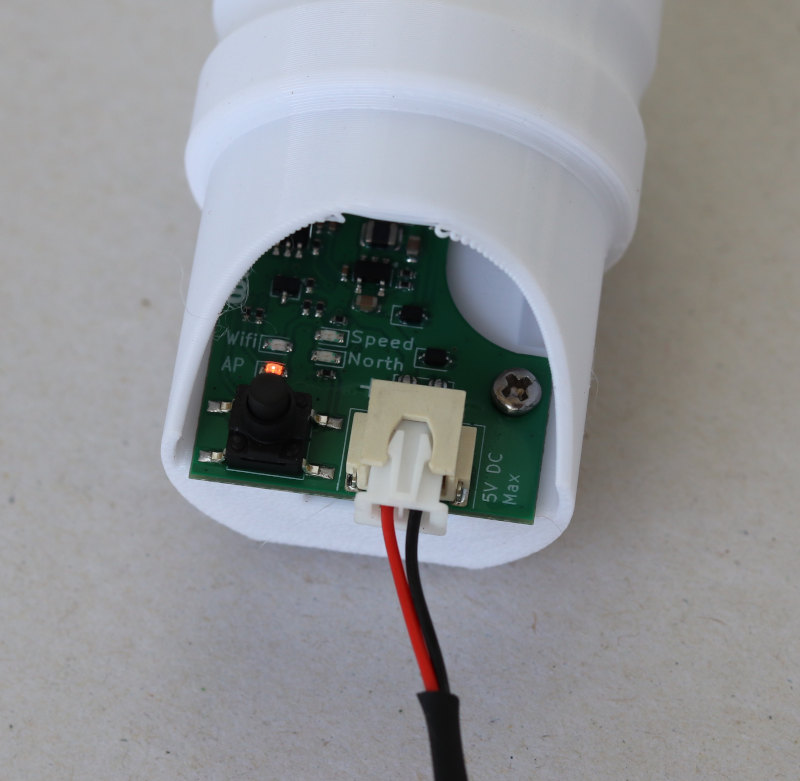
The electronic board has 2 green LED indicators to check if the sensors and magnets are working correctly.
- By turning the rotor by hand, the speed LED should blink with each rotation.
- Rotate the vane slowly to find the position where the North LED lights up. It should match the arrow indicating north.
Wi-Fi Configuration
No communication occurs through the power cable; the device needs to be connected to a Wi-Fi network to communicate with the world.
First start
-
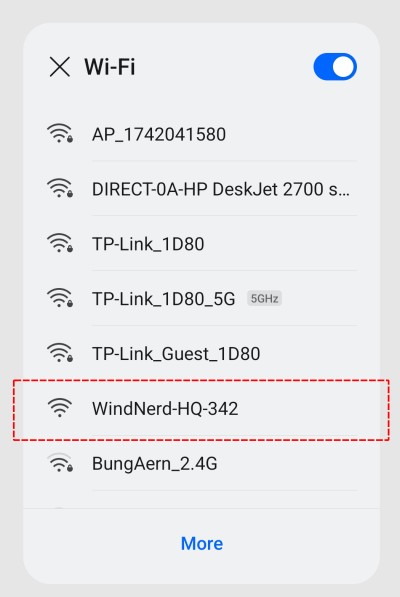
When out of the box or after a factory reset, it starts in Access Point mode (yellow LED on). Any computer, smartphone, or tablet should be able to see and connect to the "WindNerd-HQ-xxx" Wi-Fi network, where xxx is the device's serial number.
-
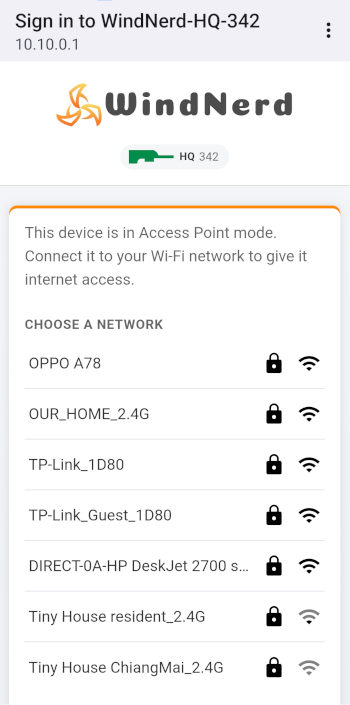
After connecting, you may be automatically redirected to a setup page (depending on the device). If not, open a browser (like Chrome or Safari) and go to 10.10.0.1 to access the WindNerd HQ.
-
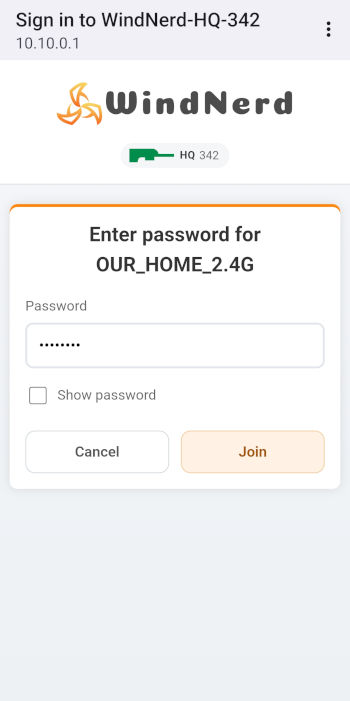
After scanning, a list of available Wi-Fi networks will appear. Select the network you want the WindNerd HQ to connect to and enter the password.
-
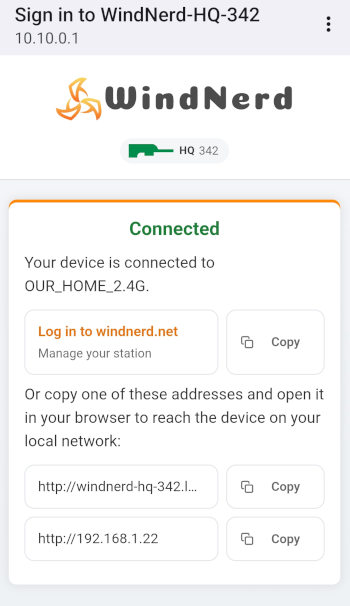
Once the connection is successful, a confirmation screen shows:
- a Log in to windnerd.net link to manage your station,
- the device's addresses on your local network,
http://windnerd-hq-xxx.localand its IP address, each with a Copy button.
Copy what you need before leaving this screen: your phone or computer will return to its usual Wi-Fi network and the setup page will close.
-
If the connection fails, an error message is shown.
-
When the blue LED turns solid, the WindNerd HQ has connected to windnerd.net.
To come back to Access Point mode later, for example to change the Wi-Fi network, press the board button for 3 seconds.
Next Steps
Your HQ is measuring and publishing wind. From here:
- Set up your station on windnerd.net: give your spot a name, choose its visibility, disable maintenance node once installed... Your station then has its own page with live wind and history.
- Configure the device on its local dashboard: connect it to MQTT, weather services such as Windy or Windguru, or your own server.
Raspberry Pi and other Linux hotspot compatibility
Hotspots created with NetworkManager (used by many Linux systems including Raspberry Pi OS) may advertise multiple Wi-Fi security protocols at the same time.
This can cause compatibility issues with the WindNerd HQ during the Wi-Fi authentication phase.
If the device cannot connect to a hotspot managed by NetworkManager, configure the hotspot to use WPA2-PSK (RSN) only.
- List available connections to identify the hotspot name:
nmcli connection show
- Force WPA2-PSK security for the hotspot:
sudo nmcli connection modify "<HOTSPOT_NAME>" 802-11-wireless-security.key-mgmt wpa-psk
sudo nmcli connection modify "<HOTSPOT_NAME>" 802-11-wireless-security.proto rsn
- Restart NetworkManager or reconnect the hotspot:
sudo systemctl restart NetworkManager
After applying these settings, reconnect the device to the hotspot.